I get alot of requests and questions regarding using the terrain pack textures up close for first and third person games. Obviously, stretching any single texture over several hundred meters will result in severe loss in detail when the camera is just above it. The terrain packs as-is are great for backgrounds, but some extra steps are recommended for using them as playable, eye-level terrains.
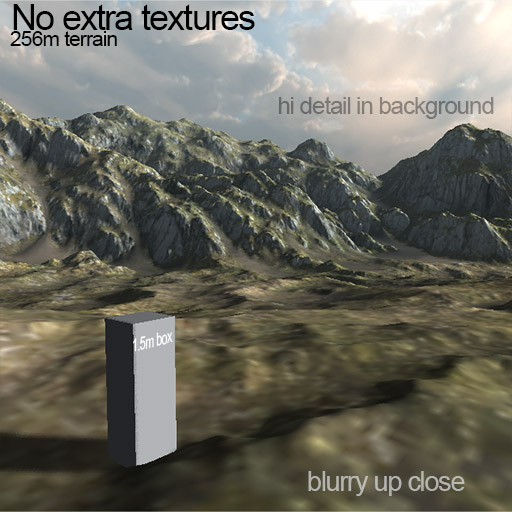 This is a shot of a Unity terrain from the Rocky Hills Terrain Pack. On such a large terrain, detail is lost up close. You can fix that by adding your own textures, tiling them, and painting them in manually but you would lose the distribution showed in the diffuse. You can get this back by replacing the current splat map with a custom one that reflects the texture layers used in the original!
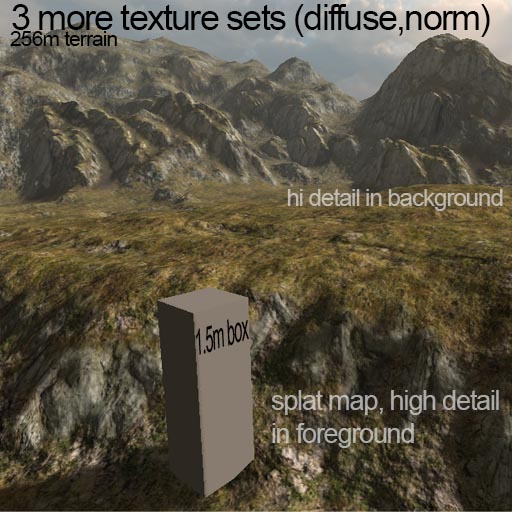
When I replace the splat map with one that was use to create the original diffuse texture, then add my own set of difuse and normal maps, I get a much higher level of quality up-close. I also chose to use the original diffuse and normal for the 4th terrain texture slot and manually paint where I want it to appear in the distance. It all comes out pretty nice.
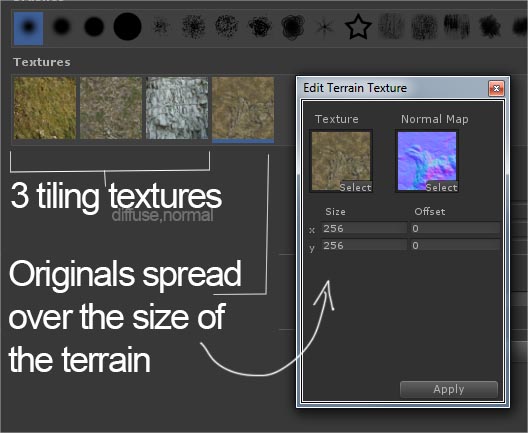
The key is the custom splat maps which are currently not included in the terrain packs as of 1/21/2014. I will be exporting them out and updating the packs asap. At that point I’ll update the blog with instructions on how to use them in your projects.
-pete